Thymeleaf is a modern server-side template engine for Java-based web and standalone environments. It can process any HTML, XML, CSS, JavaScript, or plain-text file and provides Spring Framework integration.
In my previous article, I have explained how to use Thymeleaf fragments to create small, reusable components like the header, footer, menu, etc. and include them in other templates. While fragments are good enough for working with small applications, they become hard to maintain and update as the application grows to hundreds of views.
In this article, we'll look at another way of sharing reusable page components like headers, footers, menus, and more by using Thymeleaf Layout Dialect. It is an open-source dialect for Thymeleaf that lets you build complex layouts and reusable templates to achieve higher code reusability in Spring Boot applications.
Dependencies
Apart from Thymeleaf and Spring Boot Web starter dependencies, you also need to include the thymeleaf-layout-dialect dependency for Thymeleaf Layout Dialect support.
For Gradle, include the following three dependencies to your build.gradle file:
implementation 'org.springframework.boot:spring-boot-starter-web'
implementation 'org.springframework.boot:spring-boot-starter-thymeleaf'
implementation 'nz.net.ultraq.thymeleaf:thymeleaf-layout-dialect'
For Maven, make sure you have included the following dependencies to the pom.xml file:
<dependency>
    <groupId>org.springframework.boot</groupId>
    <artifactId>spring-boot-starter-web</artifactId>
</dependency>
<dependency>
    <groupId>org.springframework.boot</groupId>
    <artifactId>spring-boot-starter-thymeleaf</artifactId>
</dependency>
<dependency>
    <groupId>nz.net.ultraq.thymeleaf</groupId>
    <artifactId>thymeleaf-layout-dialect</artifactId>
</dependency>
If you want to create a new Spring Boot project from scratch, just use Spring Initializr web tool or Spring Boot CLI.
That's all you need to do. Spring Boot will automatically configure the Thymeleaf Layout Dialect for you.
Namespace and Attribute Processors
Thymeleaf Layout Dialect will introduce the layout namespace along with 5 new attribute processors that you can use in your templates: decorate, title-pattern, insert, replace, and fragment.
To use Layout Dialect attributes in a template, you need to add the layout namespace to the <html> tag as shown below:
<!DOCTYPE html>
<html lang="en" xmlns:layout="http://www.ultraq.net.nz/thymeleaf/layout">
...
</html>
layout:fragment Attribute
The layout:fragment attribute marks sections in your layout or reusable templates that can be replaced by sections with the same name in content templates. Here is an example:
<!DOCTYPE html>
<html lang="en" xmlns:layout="http://www.ultraq.net.nz/thymeleaf/layout">
<body>

    <div layout:fragment="content">
        <p>Body contents</p>
    </div>

</body>
</html>
As you can see above, we have defined a section using layout:fragment that can be replaced by the content template. If no fragment with a given name is found in content templates, the default HTML contents will be shown.
Note: The fragment name must be unique within a template. Otherwise, fragment mismatches will occur, and an exception will be thrown.
layout:decorate Attribute
The layout:decorate is a vital attribute processor used in content templates. It is declared in the root tag (usually <html> in HTML document) as a fragment to specify the layout template to decorate the current content template.
Here is an example that shows how you can decorate the content template:
<!DOCTYPE html>
<html lang="en" xmlns:layout="http://www.ultraq.net.nz/thymeleaf/layout"
      layout:decorate="~{layout}">
<body>

    <div layout:fragment="content">
        <p>Welcome to Thymeleaf Layout Dialect</p>
    </div>

</body>
</html>
In the above example, on the 3rd line, we used the layout:decorate attribute to specify the layout template as a decorate source. We also defined a fragment that will replace the one we have declared in the layout template.
layout:title-pattern Attribute
By default, Thymeleaf Layout Dialect automatically replaces the layout template title with the one found in the content template. But you may want to keep a part of the layout template's title.
That's where the layout:title-pattern attribute comes into play. It allows us to specify a pattern with some tokens to control the resulting <title> element. So instead of overriding the layout template title, you can extend it apart from the content template.
The following example shows how you can extend the layout's title by using the layout:title-pattern attribute:
<title layout:title-pattern="$CONTENT_TITLE - $LAYOUT_TITLE">Atta Blog</title>
special
The above <title> tag must be defined in the layout template. Both $CONTENT_TITLE and $LAYOUT_TITLE are keywords that represent the content template and layout template titles.
Now, if you define the following <title> tag in the content template:
<title>Understanding Thymeleaf Layout Dialect</title>
The resulting <title> tag rendered in the HTML document will look like the following:
<title>Understanding Thymeleaf Layout Dialect - Atta Blog</title>
layout:insert & layout:replace Attributes
The layout:insert attribute is similar to Thymeleaf's th:insert, but allows us to pass the entire element fragments to the inserted templates. It is helpful if you want to reuse an HTML component whose contents are too complex to be constructed by the context variables alone.
The layout:replace attribute is similar to the first one, but with the behavior of th:replace: replaces the host tag with the fragment content.
Layout Dialect Example
Enough of the talk! Let us do some practical work to see how Thymeleaf Layout Dialect works in a real-world application.
Layout Template
Let us first create the layout template called layout.html and place it into the src/main/resources/templates/ directory. This template will contain a layout that will be shared among other templates.
layout.html
<!DOCTYPE html>
<html lang="en" xmlns:th="http://www.thymeleaf.org"
xmlns:layout="http://www.ultraq.net.nz/thymeleaf/layout">
<head>
<meta charset="UTF-8">
<meta name="viewport" content="width=device-width, initial-scale=1, shrink-to-fit=no">
<title layout:title-pattern="$CONTENT_TITLE - $LAYOUT_TITLE"></title>
<!-- Bootstrap CSS -->
<link rel="stylesheet" href="https://stackpath.bootstrapcdn.com/bootstrap/4.4.1/css/bootstrap.min.css">
</head>
<body>
<!-- Main Navigation -->
<nav class="navbar navbar-expand-md navbar-dark bg-primary">
<a class="navbar-brand" th:href="@{/}">Business Name</a>
<button class="navbar-toggler" type="button" data-toggle="collapse" data-target="#navbar" aria-controls="navbar"
aria-expanded="false" aria-label="Toggle navigation">
<span class="navbar-toggler-icon"></span>
</button>
<div class="collapse navbar-collapse" id="navbar">
<ul class="navbar-nav ml-auto">
<li class="nav-item active">
<a class="nav-link" th:href="@{/}">Home</a>
</li>
<li class="nav-item">
<a class="nav-link" th:href="@{/contact}">Contact Us</a>
</li>
<li class="nav-item">
<a class="nav-link" th:href="@{/about}">About Us</a>
</li>
</ul>
</div>
</nav>
<!-- Content Section -->
<section layout:fragment="content">
<p>This is filled by the content template.</p>
</section>
<!-- Footer -->
<footer class="container py-5">
<div class="row">
<div class="col-md-12">
<p class="text-muted">© 2022 Business Name. All rights reserved.</p>
</div>
</div>
</footer>
<!-- Optional Section -->
<th:block layout:fragment="optional" />
</body>
</html>
As you can see above, we have declared our shared components, such as the header, footer, navigation, and a main content section in the layout template.
If you have read the fragment tutorial, you can quickly spot the difference. We no longer need to create multiple fragments for different shared components. This is the most significant advantage of using Thymeleaf Layout Dialect.
Also, notice the layout:fragment attribute we applied to the <section> tag and to the <th:block> element processor provided by Thymeleaf. These layout sections are eligible for replacement by matching fragments in content templates.
Content Templates
The next step is to create some content templates for the homepage, contact, and about us pages:
index.html
<!DOCTYPE html>
<html lang="en" xmlns:th="http://www.thymeleaf.org"
      xmlns:layout="http://www.ultraq.net.nz/thymeleaf/layout"
      layout:decorate="~{layout}">
<head>
    <title>Welcome to Our Site</title>
</head>
<body>

<div layout:fragment="content">
    <section class="my-5">
        <div class="container">
            <div class="row">
                <div class="col-md-12">
                    <h1>Welcome to Our Site</h1>
                    <p>Lorem ipsum dolor sit amet, consectetur [....]</p>
                </div>
            </div>
        </div>
    </section>
</div>

</body>
</html>
contact.html
<!DOCTYPE html>
<html lang="en" xmlns:th="http://www.thymeleaf.org"
      xmlns:layout="http://www.ultraq.net.nz/thymeleaf/layout"
      layout:decorate="~{layout}">
<head>
    <title>Contact Us</title>
</head>
<body>

<div layout:fragment="content">
    <section class="my-5">
        <div class="container">
            <div class="row">
                <div class="col-md-12">
                    <h1>Contact Us</h1>
                    <p>Please send us an email at help@example.com.</p>
                </div>
            </div>
        </div>
    </section>
</div>

<th:block th:fragment="optional">
    <script src="https://code.jquery.com/jquery-3.4.1.slim.min.js"></script>
</th:block>

</body>
</html>
about.html
<!DOCTYPE html>
<html lang="en" xmlns:th="http://www.thymeleaf.org"
      xmlns:layout="http://www.ultraq.net.nz/thymeleaf/layout"
      layout:decorate="~{layout}">
<head>
    <title>About Us</title>
</head>
<body>

<div layout:fragment="content">
    <section class="my-5">
        <div class="container">
            <div class="row">
                <div class="col-md-12">
                    <h1>About Us</h1>
                    <p>Lorem ipsum dolor sit amet, [...]</p>
                </div>
            </div>
        </div>
    </section>
</div>

</body>
</html>
There is nothing new in the above content templates. We just used the layout:decorate attribute in the <html> tag to specify the the layout template name that should be decorated using these content templates.
The content templates override the fragment sections by defining their own contents and titles. In the contact.html template, we have also overridden the optional layout fragment to load the jQuery file.
Spring Boot Controller
Finally, let us create a simple Spring Boot web controller that handles the GET HTTP requests on /, /contact, and /about end-points, as shown in the below example:
IndexController.java
@Controller
public class IndexController {

    @GetMapping("/")
    public String homePage() {
        return "index";
    }

    @GetMapping("/contact")
    public String contactPage() {
        return "contact";
    }

    @GetMapping("/about")
    public String aboutPage() {
        return "about";
    }
}
Running & Testing the Application
To launch the Spring Boot application, we need to first add the main application class:
Application.java
@SpringBootApplication
public class Application {

    public static void main(String[] args) {
        SpringApplication.run(Application.class, args);
    }

}
Now run the following command in your terminal from the root directory of the project to start the application:
$ ./gradlew bootRun
If you use Maven, execute the following command:
./mvnw spring-boot:run
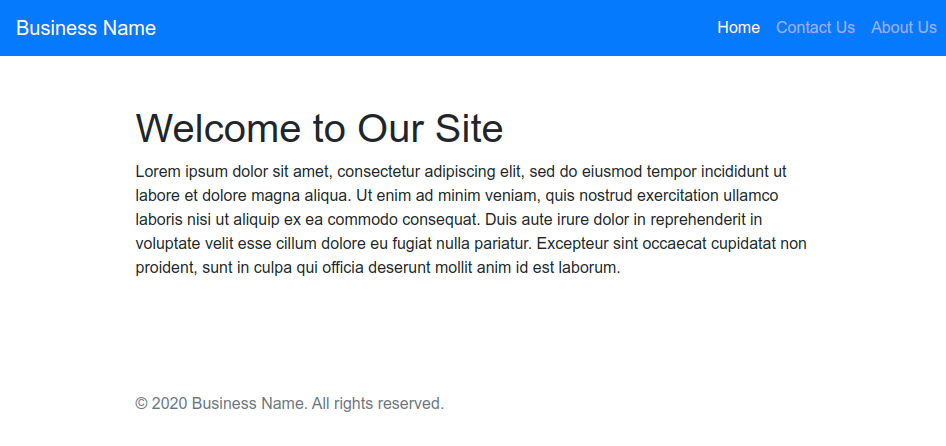
Once the application is started, open http://localhost:8080/ in a web browser to view the home page. Here is what it looks like:
Source Code: Download the complete source code from GitHub available under MIT license.
Conclusion
In this article, you have learned how to use Thymeleaf Layout Dialect in a Spring Boot web application to build highly customizable layouts and reusable templates to improve code reusability.
All you need to do is include the required dependencies to your project to use the Layout Dialect features. Spring Boot auto-configuration support will configure all the required beans for you.
Thymeleaf Layout Dialect introduces a new layout namespace and 5 new attribute processors that you can use in your templates: decorate, fragment, insert, replace, and title-pattern.
To learn more about Thymeleaf Layout Dialect, read the official documentation.
✌️ Like this article? Follow me on Twitter and LinkedIn. You can also subscribe to RSS Feed.
