
By default, Spring Boot shows a white-label error page if it encounters an error during the execution. However, you can easily create your own custom error page and configure the Spring Boot application to display it.
In this short article, you’ll learn how to disable the default white-label error page and display a customized error page in a Spring Boot & Thymeleaf web application.
If you need more information on using Thymeleaf with Spring Boot, read this guide.
Disabling White-label Error Page
To completely disable the default white-label error page, just add the following property to the application.properties file:
server.error.whitelabel.enabled=false
The above property will disable the white-label error page shown by the Spring Boot application. Instead, the default error page from the underlying application server (like Tomcat) will be displayed.
Another way to disable the white-label error page is by excluding the ErrorMvcAutoConfiguration bean by either adding the following property to the application.properties file:
spring.autoconfigure.exclude=org.springframework.boot.autoconfigure.web.servlet.error.ErrorMvcAutoConfiguration
Or the following annotation to the main application class:
@SpringBootApplication(exclude = {ErrorMvcAutoConfiguration.class})
public class Application {
    // ...
}
Displaying Custom Error Page
To display a custom error page in a Spring Boot and Thymeleaf application, just create a new Thymeleaf template called error.html inside the src/main/resources/templates/ folder. Spring Boot default BasicErrorController will automatically pick up this template and display it to the user whenever there is an error or exception.
Here is an example of a generic error.html page:
<!DOCTYPE html>
<html lang="en" xmlns:th="http://www.thymeleaf.org">
<head>
<meta charset="UTF-8">
<title>Page Not Found</title>
</head>
<body>
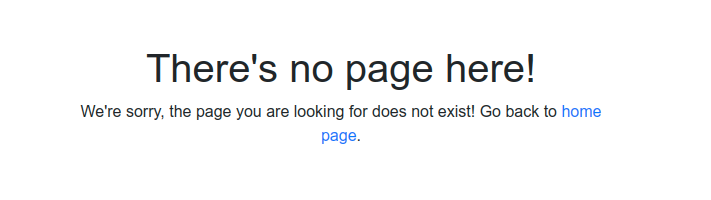
<h1>There's no page here!</h1>
<p>
We're sorry, the page you are looking for does not exist!
Go back to <a href="/">home page</a>.
</p>
</body>
</html>
This is all you need to do to display a custom error page. After adding some Bootstrap 4 styling, you’ll have a much nicer error page ready to serve the users:
You can be even more specific by putting the corresponding error page for each status code (such as 404.html in case of a 404 error) inside the src/main/resources/templates/error/ directory.
Spring Boot will look for specific error pages (404.html or 500.html) before displaying the generic error.html page whenever your application encounters an error or exception.
Custom Error Controller
The above error page templates are enough for most of the applications. But, sometimes, you want more control over how the error should be handled and a message displayed to the user. A notable example is sending the error log to a 3rd-party application or storing it in the database for later review.
To achieve this, you need to create a custom error controller that implements the ErrorController interface and overrides its getErrorPath() method to return the path of the custom error page, as shown in the following example:
MyErrorController.java
@Controller
public class MyErrorController implements ErrorController {

    @RequestMapping("/error")
    public String handleError(HttpServletRequest request) {
        // get error status
        Object status = request.getAttribute(RequestDispatcher.ERROR_STATUS_CODE);

        // TODO: log error details here

        if (status != null) {
            int statusCode = Integer.parseInt(status.toString());

            // display specific error page
            if (statusCode == HttpStatus.NOT_FOUND.value()) {
                return "404";
            } else if (statusCode == HttpStatus.INTERNAL_SERVER_ERROR.value()) {
                return "500";
            } else if (statusCode == HttpStatus.FORBIDDEN.value()) {
                return "403";
            }
        }

        // display generic error
        return "error";
    }
}
As you can see above, we have created a custom error controller that handles error requests on the /error endpoint. It tries to find the HTTP status code and returns a corresponding error page if found. Otherwise, it just displays the generic error page.
Conclusion
That’s all for creating and displaying a custom error page in a Spring Boot and Thymeleaf web application. In the first part of this tutorial, we looked at different ways to disable the default white-label error page in Spring Boot.
In the latter half of this tutorial, we discussed multiple ways to handle the Spring Boot application errors and exceptions. For simple use cases, it is enough to create corresponding error page templates inside the templates directory and let the default BasicErrorController does the rest of the work.
For more sophisticated scenarios where you want to track errors, you may want to create a custom error control and run your own custom logic when an error occurs.